 |
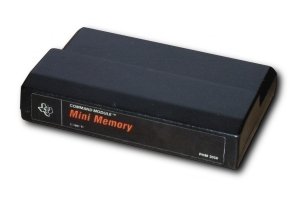
Mini Memory
Battery Replacement
|

|
|
Please make sure that all wiring and soldering is double checked before re-applying power. Though computer components are pretty hardy some do not take to being
wired up backwords or incorrectly. I have done my best to make sure that all diagrams
and instructions given here are correct, but I can not be responsible for any damage
an incorrect upgrade might cause. Also keep in mind that this will probably void any warranty :>).
|
Changing the battery in a Mini Memory cartridge is fairly simple job, and a replacement battery will last for
years.
If you would like instructions on taking a module/cartridge apart go here.
Mini Memory batteries can be ordered here.
|
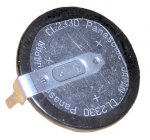
Above is a picture of a replacement battery for a Mini Memory cartridge. It is best to use a battery which already
has the solder tabs connected. Soldering these tabs onto a lithium battery could get the battery hot enough to
explode!!
|
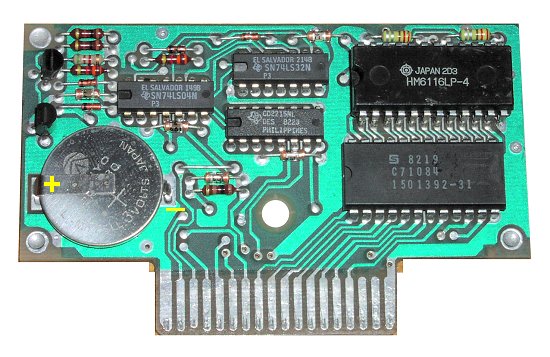
The first thing you will need to do is open the Mini Memory case and remove the circuit board. If you would like to
see instructions on how to disassemble a cartridge then go here.
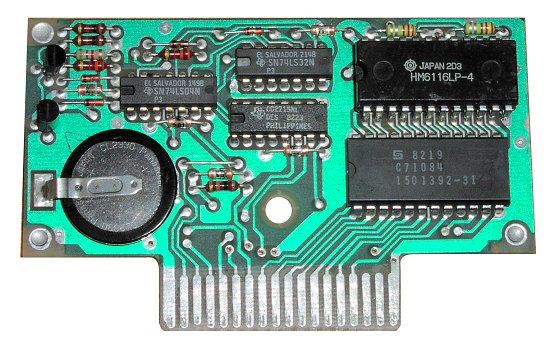
The battery we will replace is quite obvious in the above picture. I have also marked the "+" and "-"
ends of the battery. Needless to say the battery must be installed with the correct polarity.
|
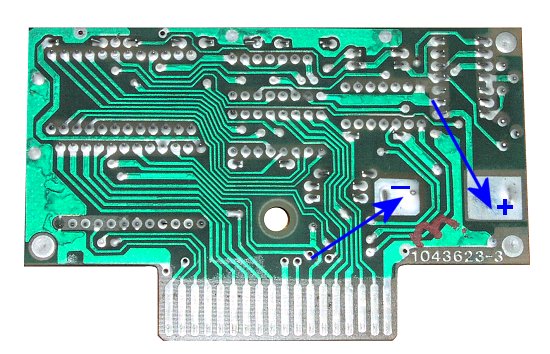
This picture shows the "solder side" of the board with the two areas where the batteries solder tabs are located.
Again I have marked the "+" and "-" to show the correct polarity. Unsolder the old battery and remove it from the
circuit board. The holes that the connectors were in are fairly large so it should not be a problem to clean the
solder out of them.
|
Next solder the new battery onto the circuit board making sure that you have the polarity correct. You may need
to bend the tabs on the battery a little to make sure they fit into the holes on the circuit board. Be careful here
not to get the battery too hot.
|
Testing the new battery
Be sure the console is powered off. The Mini Memory cartridge is one of the few that the console should be off before inserting or
removing the cartridge. Insert the cartridge, turn on the console and choose basic from the menu.
Type in a small program, a couple of lines will be suffice. Then type: SAVE MINIMEM Next, turn off the console and
remove the minimem cartridge.
Wait several minutes and insert the minimem cartridge back into the console. Turn
the console back on, choose basic again and then type: OLD MINIMEM Type: LIST and you should see the program listed
that you saved to the Mini Memory cartridge earlier.
|
